

In our previous article, we explored how to use the Red Hat Ansible Automation Platform to create an instance in Google Compute Engine. We saw how Ansible Automation Platform can streamline the process of deploying instances in GCP, making it more efficient and less error-prone.
In this article, we'll explore how to simplify the process of creating Instances in GCP by using workflow templates with Ansible Automation Platform. Workflow templates can help us to standardize the process of creating VMs and reduce the amount of manual intervention required. We'll dive into the details of how to use workflow templates with Ansible Automation Platform to further optimize our infrastructure management in Azure.
If you're following along with our series, you may recall that we previously discussed the importance of creating an execution environment and setting up credentials. These are essential steps that need to be completed before deploying a workflow template. In case you missed that article, we recommend you to check it out to ensure that you're ready to move forward with the next steps. We'll assume that you have already set up your execution environment and credentials, and we'll focus on how to deploy a workflow template in GCP using Ansible Automation Platform.
Follow the series:
Part 1: How to create an instance on GCP using Ansible CLI
Part 2: How to create a GCP instance using Ansible Automation
Part 3: How to create a GCP instance via workflow and Ansible
Creating and configuring the project
- Log in to the Ansible Automation Platform Portal in a browser.
- Navigate to the "Projects" tab under resources and click "Add".
- Provide your project name and choose "Git" as the source control type.
- Enter the source control URL as https://github.com/redhat-developer-demos/ansible-automation-platform-cloud-solutions. If you're interested in checking out the playbooks, you can find them on GitHub.
- Save your changes and wait for the operation to complete successfully. When selecting Git as your source control type, the platform pulls down the latest versions of your files for use in Ansible jobs and workflows. This makes it easy to manage changes, collaborate with others, and track configuration history over time.
Creating and configuring the job templates
- Go to the "Templates" tab and click "Add", then select "Job template".
- Name your job and select the default or "Demo-Inventory" under "Inventory".
- Under "Project", select the project name you created earlier and choose the "GCP/Workflow/01_create_disk.yml" playbook file.
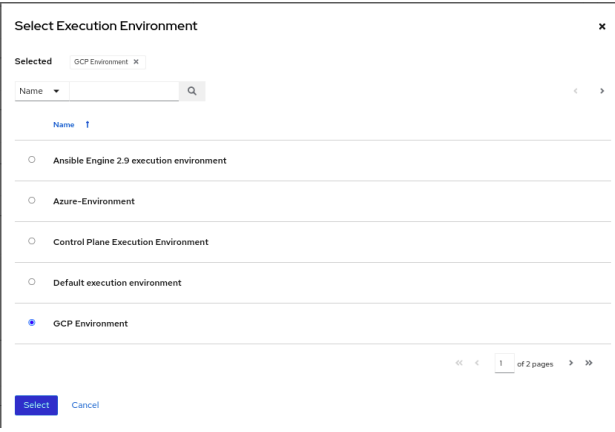
- Choose the credentials and execution environment you previously created.
- Figure 1 shows where to select GCP credentials.
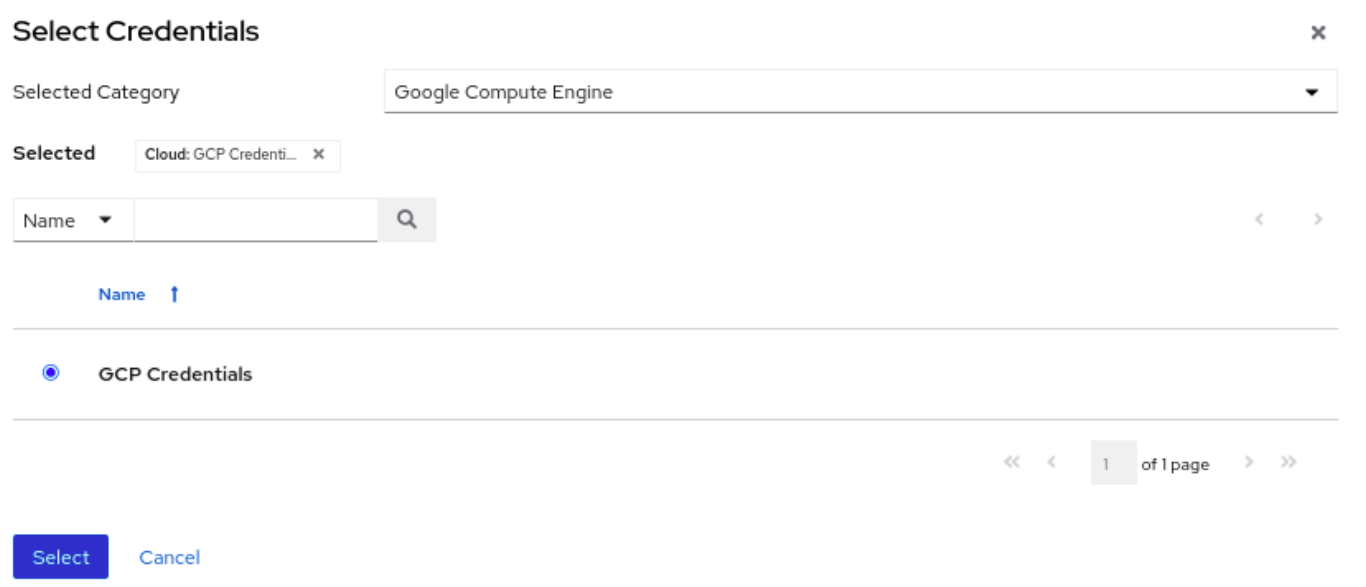
Figure 2 shows where to select the pre-configured execution environment.
- Repeat the previous steps for any other playbooks in the "GCP/Workflow/" directory.
Creating and configuring the workflow templates
- To start, create a workflow template and assign a name to it (Figure 3).

- In the "Variables" section, add the following variables.
---

network_name: "test-ansible-network"

subnet_name: "test-ansible-subnet"

ip_name: "test-ansible-ip"

disk_name: "test-ansible-disk"

machine_name: "test-ansible"

region: "asia-south2"

zone: "asia-south2-a"

source_image: "projects/ubuntu-os-cloud/global/images/family/ubuntu-1804-lts"

subnet_cidr: "10.0.1.0/24"

disk_size: 10

machine_type: "f1-micro"
- Save the workflow before proceeding and visualize the workflow when prompted (Figure 4).
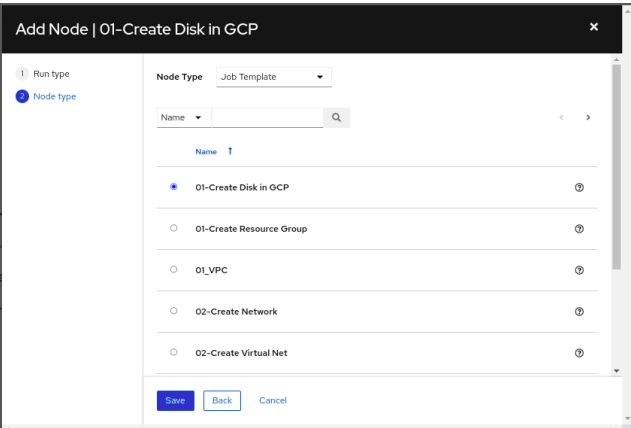
- Once you have confirmed the workflow, add each job template to its respective node (Figure 5).
- After all job templates have been added, launch the workflow to execute it.

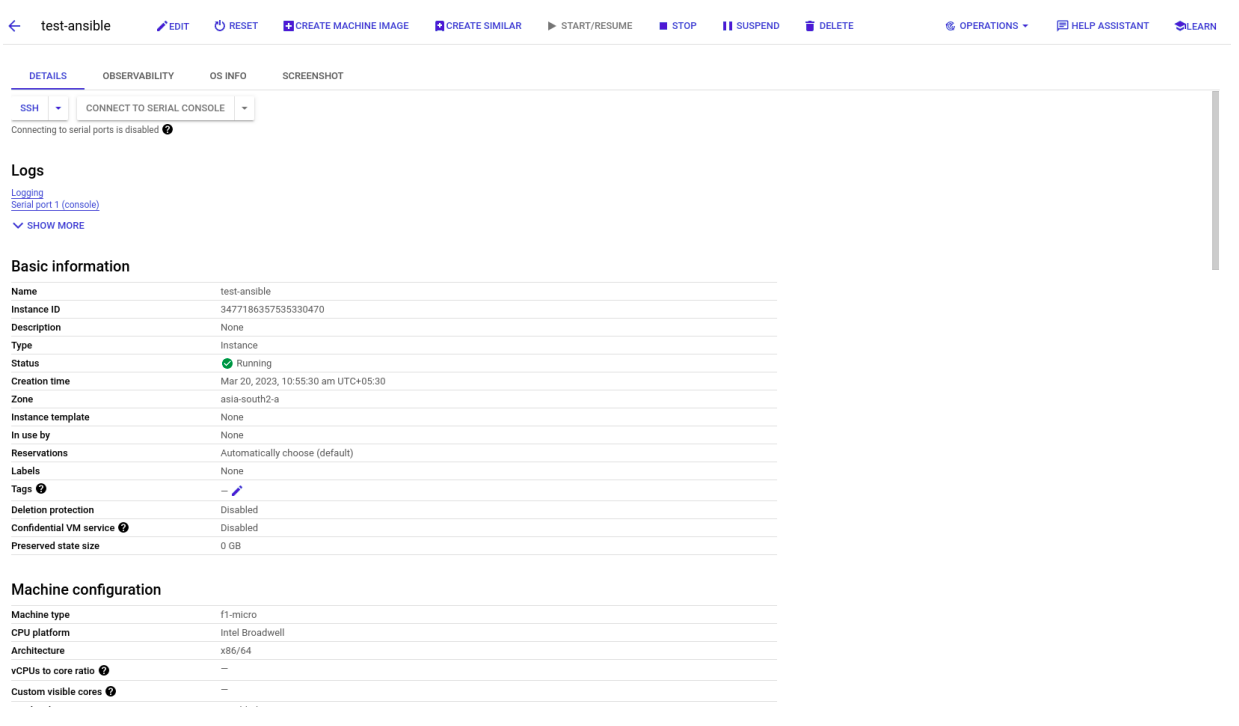
Once the workflow is executed, the instance will be up and running, ready for you to use as seen in Figure 6. This streamlined process ensures that the Instance is created quickly and efficiently, saving you valuable time and effort while helping different teams to analyze the possible point of failures.
Summary
We demonstrated how Ansible Automation Platform can streamline the process of deploying Instances in GCP. With the ability to automate repetitive tasks, you can reduce manual intervention and avoid human error, leading to faster, more consistent deployments and improved reliability.
To explore more of what Ansible Automation Platform has to offer, visit the official website to download and get started. You may also explore the Ansible on Azure lab for deploying Ansible Automation Platform on Microsoft Azure and performing automation tasks in your Azure environment. Additionally, there are various e-books available to help you explore the capabilities of Ansible Automation Platform, with Automation at the Edge, Choosing an Automation Tool, and An IT Executive's Guide to Automation. A cheat sheet is also available for WiFi automation with Ansible and SD to provide you with a quick reference for network automation tasks.
We hope this series has provided a solid foundation to explore the potential of Ansible Automation Platform in your own environment. As you continue to learn and experiment with cloud infrastructure management, remember to stay up-to-date with the latest trends and techniques by exploring blogs and interactive labs at Red Hat Developer.
